
25 Diamond Painting Tips and Tricks Every Crafter Should Know
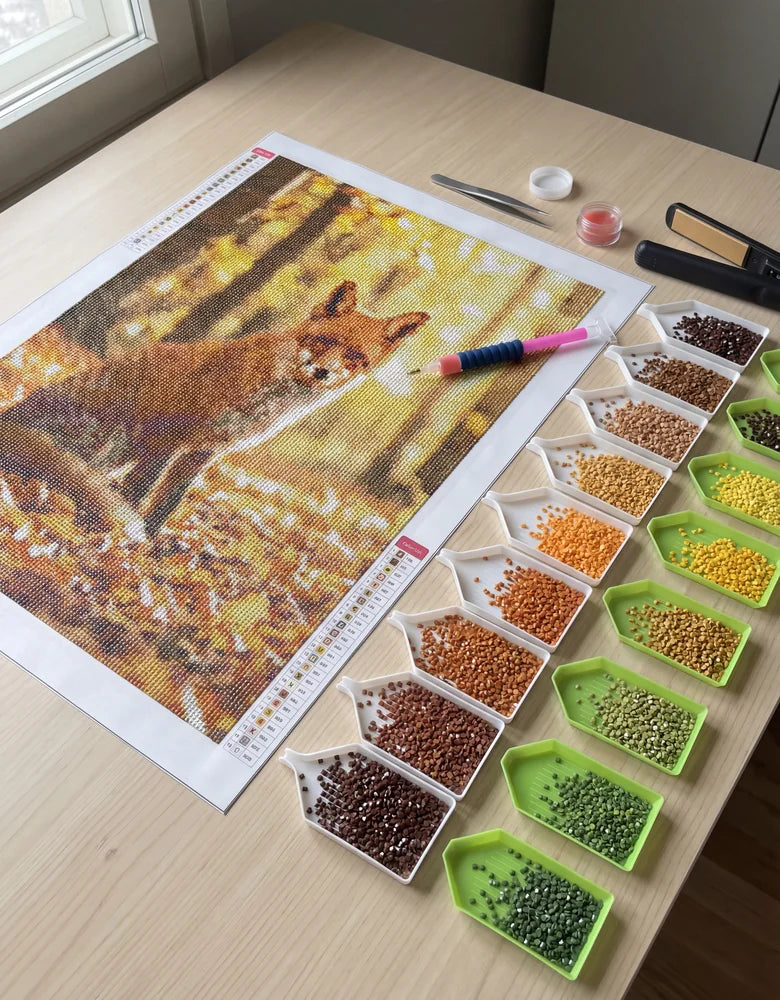
A tidy tray, clearly labelled colours and a manageable working area make a useful starting point for diamond painting. If you are losing track of symbols, struggling to pick up drills or wondering how to store a half-finished canvas, start with the relevant section below.
These 25 diamond painting tips and tricks cover setup, drill placement, troubleshooting, storage and display. Choose the ideas that fit your kit and the way you like to work; you do not need to adopt every technique or buy extra tools before starting.
Setup and Workspace Tips
Getting your workspace right before you start is half the battle. These first five tips will help you work more comfortably and avoid problems down the line.
1. Use a Light Pad Under Your Canvas
Start by checking whether you can read the symbols with your normal task lighting. If not, a light pad beneath the canvas is one option to try. Choose a size that supports the area you are working on and adjust the light to avoid glare. It is an optional aid, not a requirement for every canvas.
2. Prepare Your Workspace Properly
Clear your table completely before starting. You'll want a flat, stable surface with enough room for your canvas, drill trays, tools, and a drink (kept safely away from the canvas). A clean white or light-coloured surface helps you spot dropped drills immediately. Some crafters use a large cutting mat underneath — it protects the table and gives the canvas a bit of grip.
3. Flatten Your Canvas Before Starting
Unroll the canvas onto a clean, flat surface with its original protective cover in place. Let it rest and follow any flattening instructions supplied with the kit. Do not use an iron or hairdryer unless the canvas manufacturer explicitly permits that method. If a crease lifts the adhesive or makes the symbols hard to read, ask the seller for advice before working over it.
4. Organise Your Tools Before You Begin
Check the contents against the list supplied with your kit. Match each drill bag to the canvas legend before opening it, and keep the packaging until the project is finished. Set out your applicator, tray and the pickup material specified for your pen, then open only the colour you are about to use.
5. Mind Your Posture
Arrange your chair, canvas and tools so you can reach the working area without leaning across the table. Keep any angled support stable so the canvas and trays cannot slide. Pause regularly, change position and adjust the setup if you feel uncomfortable; you do not need to finish a section before taking a break.
Speed and Efficiency Tricks
With your workspace ready, try these placement techniques on a small area and keep the ones you find useful.

6. Master the Multi-Placer Pen
If your pen accepts a multi-placer tip, practise with a short row of the same colour in the tray. Check that the drills sit evenly in the tip and line them up with the printed symbols before placing them. Switch back to a single placer for isolated symbols or whenever you find it easier to control.
7. Sort Your Colours Before You Start
Use labelled containers or resealable bags to keep colours separate. Transfer one colour at a time, copying the bag code and its matching symbol from the canvas legend before opening the next bag. Keep the kit name with the labels so you can trace each colour later. If you need organisers, browse our diamond painting storage and accessories.
8. Use the Checkerboard Method
With square drills, try placing every other drill in a small section, then filling the empty spaces. Use the printed grid to check the alignment as you go. This checkerboard method is an option, not a rule: if a gap is too tight, adjust the surrounding drills gently instead of forcing another one into place.
9. Work in Sections, Not by Colour
Peel back enough protective cover for an area you can comfortably reach and finish during the session. Work through its symbols, then cover any unfinished adhesive again before moving on. Smaller sections help you keep your hand away from exposed adhesive; choose the section size to suit your canvas rather than following a fixed measurement.
10. Shake Your Tray the Right Way
Pour a small amount of one colour into the tray and gently shake it from side to side. Look for drills with the flat side down and faceted side up, ready for the pen. Turn any remaining upside-down drills individually, and reduce the amount in the tray if they are piling on top of one another.
11. Check the Wax in Your Pen
If the pen stops picking up drills, check the tip for old pickup material and follow the pen instructions for cleaning and refilling it. Use a small amount of the wax or putty recommended for that applicator; remove excess from around the tip. You do not need to reload before every drill. Our guide to loading wax and troubleshooting drill pickup explains the basic checks.
Common Mistakes and How to Fix Them
Even experienced diamond painters run into problems. These tips cover the most common diamond painting mistakes to avoid — and what to do when they happen anyway.
12. Fix a Curling Canvas
Keep the canvas supported on a flat surface while you work. If the unworked border lifts, hold that border in place without pressing on the adhesive or completed drills. Avoid tightly reverse-rolling a partly completed painting. If it will not lie comfortably without force, pause and check the kit guidance before trying to flatten it further.
13. Avoid Confusing Similar Colours
Identify a colour by the bag code and canvas legend, not by how dark it looks in the tray. Keep similar shades in separate, labelled containers and open one at a time. If a label is unclear, compare it with the original packaging before placing more drills. Do not guess a code from a screen image or from another kit.
14. Remove and Replace Wrong Colours
Check the symbol and correct colour first. If the misplaced drill lifts readily, use tweezers to pick it up gently without scraping the printed canvas or pulling at neighbouring drills. Stop if it resists or the adhesive starts to lift. Do not cut into the surface or add an unspecified craft glue; ask the seller about a repair suited to that canvas.
15. Check Gaps and Alignment
Round drills leave spaces between their curved edges; do not try to remove those spaces by pushing the drills off their printed positions. With square drills, check each piece against the grid and gently straighten any that are rotated. If a drill will not fit, check its shape and size against the kit rather than forcing it into a gap.
16. Keep Your Rows Straight
Use the printed grid to guide each row and check the alignment after a few placements. Work from whichever edge you can reach comfortably. If a drill is out of position and still moves easily, adjust it before surrounding it with more drills; stop if correcting it would lift or damage the adhesive.
17. Prevent Dust and Hair Under Drills
Keep unused adhesive covered and close drill containers between sessions. Remove loose dust from the surrounding workspace before opening the canvas. If a hair lands on exposed adhesive, lift it gently with tweezers only if it comes away easily. Avoid pressing sticky tape or a lint roller onto the adhesive, and stop if the surface begins to lift.

Storage and Organisation Tips
A well-organised system saves you time on every session. These tips are especially useful for crafters juggling multiple projects.
18. Invest in Proper Drill Storage
Choose bags or individual compartments that close securely, and keep the colours from each kit together. Label them before transferring drills, retaining the kit name and original colour code. A simple system you can maintain is more useful than a large organiser with unlabelled compartments.
19. Store Work-in-Progress Carefully
Cover unfinished adhesive with the clean original protective film, returning the same side to the canvas. If you need a replacement cover, choose release paper specified for diamond painting and check its instructions. Do not assume kitchen parchment or wax paper is interchangeable with the original cover. Store the supported canvas flat where it will not be folded or crushed; use a rolled storage method only if the kit instructions allow it.
20. Keep Colour Codes with the Kit Details
Keep the original kit code on each container. If the kit identifies a DMC colour number, record that too, together with the brand or kit name and drill shape. Not every brand uses the same numbering system, and a shared colour number alone does not establish that spare drills are a suitable match. Compare the actual shade, shape, size and finish before using a replacement.
21. Manage Leftover Drills
Keep leftover drills in labelled bags with the kit details. Use them to replace a missing drill in that same project, or set them aside for a separate freestyle design. Before using spares in another kit, check the actual colour, shape, size and finish. If you run short, contact the seller with the kit name, colour code and a photograph of the legend rather than substituting a similar-looking colour.
Finishing and Display Tips
You've placed every last drill. Now what? These final tips will help your diamond painting look its absolute best.
22. Decide Whether to Seal
Before choosing a finish, check for missed symbols and drills that have not seated properly. Sealing is not a compulsory step for every diamond painting. Follow the kit guidance and, if you decide to use a sealer, choose one whose instructions cover your canvas and drills. Check the application, drying and handling directions before starting. Do not assume that general PVA glue or any clear spray is compatible; if suitability is unclear, leave the work unsealed while you ask for advice.
23. Choose a Frame with Enough Depth
Choose a frame that has enough depth for the drilled surface. Glass is a display preference, not something you must always include or avoid; if you use it, leave clearance so it does not press on the drills. Check the mounting method for your canvas before stretching, gluing or trimming it, and ask a framer if you are unsure.
24. Mount and Hang Properly
Measure the completed work and check the frame and mounting instructions. Choose fixings rated for the total weight of the artwork and frame and suitable for the wall surface. Do not judge the fixing needed from canvas dimensions alone or assume that any double-sided tape will hold it. Follow the material supplier’s display guidance when choosing a location.
25. Photograph Your Finished Work
Good photos show off your hard work and are perfect for sharing online. Photograph in natural daylight, near a window, at a slight angle (not dead straight-on — you want to catch the sparkle). Avoid flash, which creates harsh reflections. A plain background — white wall, wooden table — keeps the focus on the painting itself. Many crafters build an impressive portfolio of their completed works over time.
For your next project, browse our diamond painting kits, or explore a diamond painting kit made from your own photo. If you want a walkthrough of the basic process first, start with our beginner’s diamond painting instructions.
Frequently Asked Questions
What is the best way to start diamond painting as a beginner?
Choose a design you like with an amount of detail you feel comfortable tackling. Prepare a clear, well-lit space, match the drill bags to the legend and begin with one small section. A simpler design gives you fewer colour changes to manage while learning; there is no compulsory first-kit size.
How long does a diamond painting take to complete?
There is no reliable completion time based on canvas size alone. The drilled area, colour changes, drill shape and your own pace all matter. To plan your time, note how long you spend on a small section, then use that as a rough guide for similar areas. Allow extra time for detailed sections and corrections rather than treating the estimate as a deadline.
Should I use round or square drills?
Round drills do not need to be rotated to line up straight edges, while square drills need closer attention to their orientation. Their finished appearance differs too: round drills leave spaces between the curved edges, whereas squares form rows of straight edges. Choose the look and placement style you prefer. Our round and square drill comparison shows the two shapes.
Do I need to seal my diamond painting when it's finished?
Not automatically. Check the kit instructions before adding a finish. If you choose to seal, use a product specified for your materials and follow its application, drying and handling directions. General craft glue and clear sprays are not interchangeable with a suitable diamond painting sealer.
What can I do with leftover diamond painting drills?
Keep them labelled with the kit name, original colour code and drill shape. They can be useful for a repair to that project or a separate freestyle design. Before putting them into another kit, compare the actual shade, size, shape and finish; the same number on two bags is not enough to confirm a match.
