
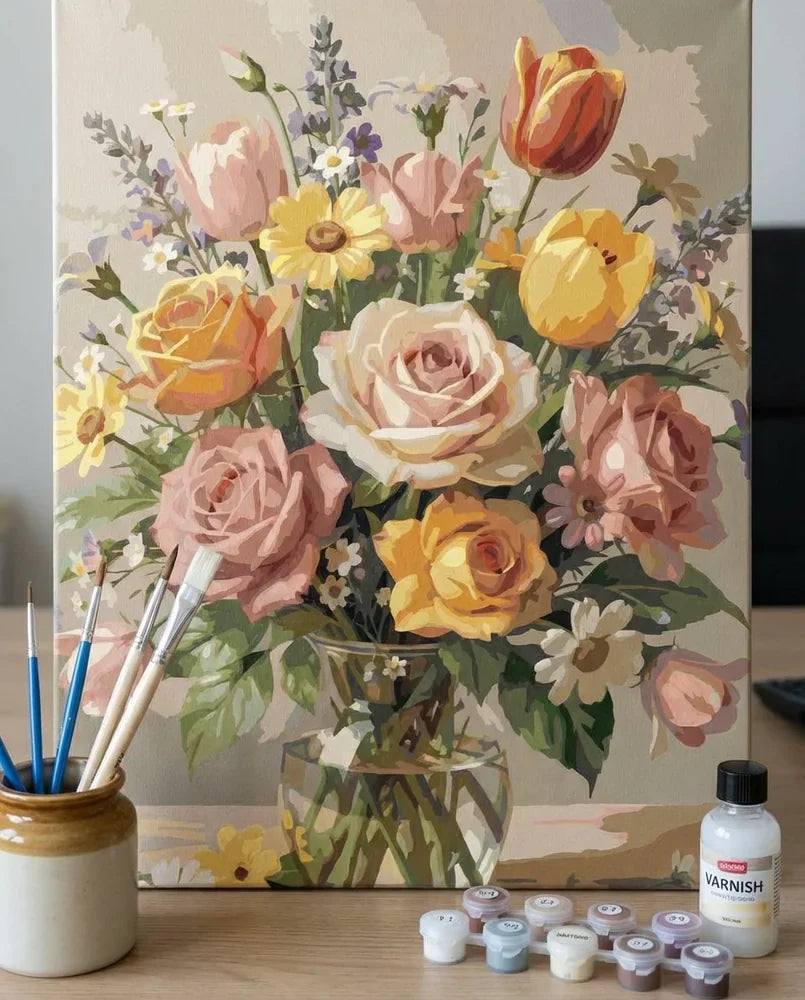
20 Paint by Numbers Tips and Tricks for a Better Finished Painting
You've got the kit open, the canvas is laid out, and you're ready to start — but then you realise there's a difference between simply filling in numbered sections and creating something that actually looks good on a wall. Paint by numbers is forgiving by design, but a handful of practical techniques can dramatically improve your results, speed up the process, and make the whole experience more enjoyable.
These 20 tips cover the full process from setting up your space to displaying the finished piece. Some are aimed at beginners, others at people who've already completed a few canvases and want to step up their game. Take what's useful, ignore what you already know.
Setup and Workspace
The way you prepare before painting matters more than most people expect. A good setup prevents frustration and helps you paint for longer without fatigue.
1. Get Your Lighting Right
Position a desk lamp so you can read the numbers and boundary lines without your hand casting a shadow over the area you are painting. Adjust its position if you see glare, and compare each pot number with the canvas legend before using the colour.
If you find yourself painting in the evenings regularly, a clip-on LED lamp or a ring light positioned over the canvas makes a noticeable difference. Some crafters also use a small magnifying glass for particularly detailed sections — especially helpful for canvases with 30+ colours.
2. Prepare Your Canvas Before Starting
Most canvases arrive rolled or folded, and a warped surface makes precise painting difficult. Unroll it and lay it flat under heavy books for at least a few hours — overnight is better. If the edges still curl, weigh them down with clean mugs or tape the corners to your work surface with low-tack masking tape.
Check the canvas against the reference image and the paint number legend before starting. Occasionally, a printed number can be hard to read. Identifying these trouble spots in advance means you won't be guessing mid-painting. If you're not sure which size suits you best, our paint by numbers size guide covers the options in detail.
3. Organise Your Paints by Number
Open every pot and check the contents before you start. Arrange the pots in numerical order on a tray or in a sectioned box — this saves enormous amounts of time during a session. When you're looking for pot number 14, you shouldn't be rummaging through a pile of unmarked containers.
Some experienced painters transfer their paints into larger pots or a wet palette to keep them workable for longer sessions. At minimum, keep the lids closed when you're not actively using a colour. Acrylic paint dries faster than you'd expect.
4. Keep Water and Cloth Within Reach
Keep rinse water and a cloth or paper towel within reach. Rinse the brush when changing colours and blot excess water before picking up paint. If the rinse water becomes heavily coloured, replace it rather than carrying the previous colour into the next pot.
5. Consider an Easel for Larger Canvases
If you're working on a canvas 40×50 cm or larger, painting flat on a table can strain your neck and back over long sessions. A tabletop paint by numbers easel holds the canvas at a comfortable angle and lets you step back to see the overall picture — something that's nearly impossible when you're hunched over a flat surface. Even a simple tabletop easel makes a significant difference.
For smaller canvases (20×30 cm or 30×30 cm), a flat surface works perfectly well. The key is to position the canvas so you're not bending your neck downward for extended periods.
Painting Techniques
These tips cover how to actually apply paint for the best results. Most of them are things you'll figure out eventually through trial and error — but knowing them from the start saves a lot of frustration.

6. Choose a Comfortable Painting Order
There is no single order you must follow. Start with a section you can reach comfortably without resting your hand on wet paint, and work through its numbered areas. You can begin with lighter colours if you prefer, but do not rely on a darker or lighter paint to hide mistakes in one coat: coverage varies between colours. Keep the reference image nearby so you can identify a number after painting over it.
7. Paint Large Areas First, Details Last
Within each colour, tackle the bigger sections before the small ones. This gets you comfortable with the paint's consistency and the brush's behaviour before you need fine control. By the time you reach the tiny sections — a single eye highlight, a narrow line of reflection — your hand will be steadier and you'll have a better feel for how much paint to load on the brush.
8. Use the Right Brush for the Right Area
Choose a brush that fits the area rather than using the same brush throughout. A broader brush is useful for open sections, while a fine tip lets you approach narrow spaces and boundaries. Check the brushes supplied with your own kit instead of assuming every set contains the same shapes.
If a brush feels too large for a section, switch to a smaller one before continuing. For a closer look at detail, round and flat brushes, see our guide to choosing brush shapes and sizes for paint by numbers.
9. Apply Thin, Even Layers
Start with a small amount of paint on the brush and spread it across the numbered area without leaving a puddle. Let the layer dry, then check whether the number or canvas still shows through. Add another thin layer only where it is needed; there is no fixed number of coats that suits every colour.
If numbers or boundary lines remain visible, our guide to why light paint does not always cover numbers discusses paint coverage and layering.
10. Don't Overwork Wet Paint
Once you have laid down a coat, leave it to dry before deciding whether it needs another layer. If the brush begins to drag or lift the surface, stop working that area. Drying time depends on the paint, the thickness of the layer and the conditions in your workspace; follow any instructions supplied with the paint.
11. Try Simple Blending at Boundaries
This is the tip that separates a decent paint by numbers painting from one that looks genuinely impressive. Where two colours meet, the transition can look harsh — like a colouring book rather than a real painting. To soften these boundaries, use a slightly damp brush to gently feather the edge of a colour while it's still wet, blending it very slightly into the adjacent section.
You don't need to blend everywhere — just at the most visible transitions, like where a face meets a background or where sky meets horizon. Even subtle blending gives the finished piece a noticeably more painterly quality. Start conservatively: blend less than you think you should.
Common Mistakes and How to Fix Them
If something goes wrong, pause and identify the problem before adding more paint. Use the checks below to decide whether to let an area dry, add another layer or replace a damaged material.

12. Check Thickened or Dried-Out Paint
First check whether the paint is still soft enough to stir or has become a solid, hardened mass. Thickened paint and fully hardened acrylic are not the same problem. Do not expect water or medium to turn a hardened lump back into usable paint, and do not add household chemicals. For still-mixable paint, follow the instructions supplied with it; if those are unclear, ask for advice before adding anything. Our dried paint troubleshooting guide explains the replacement options when paint is dried out or missing.
13. Correct Wrong Colours Calmly
Let the mistaken colour dry before trying to paint over it. Apply the intended colour to the affected area, let it dry and check the coverage before adding more. The result depends on the actual paints, not simply on which colour looks darker. Avoid scrubbing the printed canvas to remove the mistake.
14. Hide Visible Numbers and Lines
If a number or boundary line remains visible after the paint has dried, try an additional thin layer on that area and assess it again once dry. If you are considering a white correction pen, check its instructions for use on painted canvas before applying it. Do not assume that any white pen will be compatible with your paint.
15. Clean Your Brushes Properly
Clean the brush before paint dries in the bristles. Rinse between colours and clean it at the end of the session according to the brush and paint instructions. Reshape the tip gently after rinsing and let it dry without resting its weight on the bristles. Avoid leaving brushes standing in rinse water.
If paint has hardened in the bristles, consult the brush manufacturer before using a cleaner. Use only a product suitable for that brush and follow its handling instructions. Avoid improvised solvent soaks; if cleaning does not restore the tip, replace the brush.
16. Don't Fight Tiny Sections
For a very small section, use the tip of a fine brush with a small amount of paint. Turn the canvas if that gives you a more comfortable approach, and use the reference image to check the number before covering it. If you cannot identify the section, ask for clarification rather than guessing.
Finishing and Display
You've painted every section. The canvas is complete. These final tips will make the difference between a painting that sits in a drawer and one that genuinely looks good on a wall.

17. Decide Whether to Varnish
Varnishing is a finishing choice, not a required step for every painting. If you decide to use it, choose a varnish whose instructions cover your paint and canvas, and follow its preparation, drying, application and handling directions. Do not apply it until the painting has dried for the period specified by the varnish manufacturer.
Compare the finish on a separate sample made with the same materials before treating the artwork. Matte, satin and gloss products are intended to give different surface finishes. Check the product information for any claimed protective properties rather than assuming every clear varnish provides the same protection.
18. Give It a Final Touch-Up
Before choosing a finish or frame, step back and look at the painting as a whole. Check for missed sections, visible numbers and paint that crosses a boundary. Decide which areas you want to touch up, then allow those changes to dry before handling or finishing the work.
Check the edges and narrow strips between larger sections as well. Use the reference image to distinguish a missed area from a detail that is meant to remain a different colour.
19. Frame and Display Properly
Choose a display method that suits the canvas and the space where you want to hang it. Our framing and display guide explains the options. Measure the finished canvas and check the frame instructions before stretching or mounting it; do not assume the printed design size is the same as the outer canvas size.
Choose a display spot away from direct sunlight and follow any display guidance supplied with your materials. If you are deciding what to paint next, our paint by numbers size guide helps you compare the options with the space you have available.
20. Photograph Your Work Before Hanging
Take a good photo of the finished painting in natural daylight before you frame and hang it. Lay it flat on a clean surface, photograph from directly above (to avoid perspective distortion), and make sure there are no shadows falling across it. These photos are perfect for sharing online, keeping a personal record, or simply admiring how far you've come since your first kit.
Some painters keep a dedicated album of their completed works — it's genuinely motivating to see your skills improve from painting to painting.
Ready for your next project? Browse our paint by numbers collection for designs at every difficulty level, from simple landscapes to detailed portraits. And if you're just getting started, our beginner's guide to paint by numbers covers the full process from opening the kit to your first completed painting.
Frequently Asked Questions
What is the best order to paint a paint by numbers canvas?
There is no single required colour order. Choose an area you can reach without resting your hand on wet paint, then work through its numbered sections. Starting with light colours is one option, but coverage depends on the actual paint rather than colour brightness alone. Let a layer dry before deciding whether it needs another coat.
How do I stop acrylic paint from drying out in the pots?
Close each pot firmly when you are not using that colour, including during a painting session. Keep the rim clean enough for the lid to close properly and follow the storage instructions supplied with the paint. If it becomes thick or hard, check its condition before attempting to use it; do not add glycerine or other household additives.
Do I need to varnish a finished paint by numbers painting?
No: varnishing is a choice, not a compulsory finishing step. If you want to varnish your painting, use a product intended for the materials and follow its preparation, drying and handling instructions. Try the finish on a separate sample first. Check the product label for the finish and protection it offers.
Can I make a paint by numbers painting look more like a real painting?
You can personalise the finish by adjusting selected colour boundaries, checking coverage and choosing a display style you like. Try optional techniques on a small practice area before changing a detailed section. Choose the finishing touches you enjoy; you can also leave the numbered colour boundaries as they are.
Is paint by numbers too easy for experienced painters?
Not necessarily. While the basic concept is simple, more complex designs with 30–40 colours and detailed compositions provide genuine challenge even for experienced artists. The real creative opportunities lie in blending, layering, and adding your own subtle touches to elevate the finished piece beyond what the kit alone produces. Many experienced painters enjoy paint by numbers precisely because it removes the pressure of composition and colour mixing, letting them focus purely on brushwork and technique.
