How to Frame a Paint by Numbers Painting
Framing your paint by numbers canvas transforms it from a hobby project into a proper piece of wall art. A well-stretched, neatly framed paint by numbers canvas looks professional and can hang proudly in any room of your home.
This guide covers everything: assembling a stretcher frame, stretching the canvas, varnishing your finished work, choosing the right frame type, and hanging the result. If you're new to paint by numbers, have a look at our beginner's guide first — then come back here when your masterpiece is ready for the wall.

Should You Frame Before or After Painting?
We recommend stretching your canvas onto stretcher bars before you start painting. Here's why:
- Stable surface. A stretched canvas stays flat on your table or easel. No rolling, no shifting mid-stroke.
- Better brushwork. The taut surface gives you more control, resulting in smoother, more even paint coverage.
- No damage to your finished work. Stretching a painted canvas risks cracking the acrylic paint, especially in areas with thicker layers. The pulling and bending can leave visible marks.
- It's simply easier. Working with a bare canvas is more forgiving. Once the paint is on, the canvas becomes stiffer and harder to handle.
If you've already finished painting without a frame, don't worry — it can still be done. Work slowly, be gentle, and avoid bending painted areas at sharp angles. The result won't be quite as crisp, but it'll look great on the wall.
What You'll Need
For stretching with wooden stretcher bars:
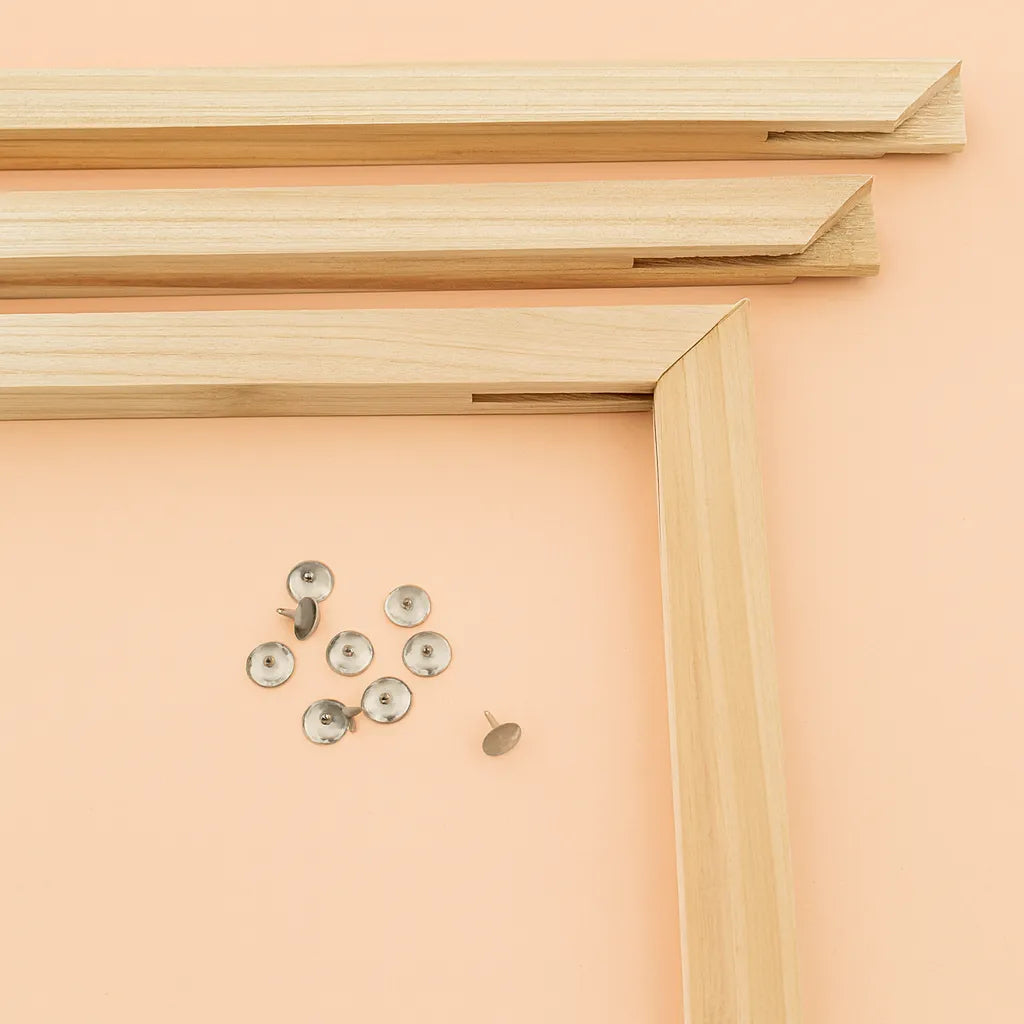
- A set of stretcher bars (matched to your canvas size)
- Canvas pins (included with our frames)
- Your paint by numbers canvas
- An iron (for smoothing out wrinkles)
- A flat, clean work surface
No special tools are needed. Our stretcher frames have pre-cut slots that fit together without glue, nails, or a hammer.
How to Assemble the Stretcher Frame

Start by connecting the frame pieces. Slide one long bar into a short bar, then attach the second short bar, and finally slide the remaining long bar into place. You should end up with a neat rectangle where every corner forms a 90-degree angle.
Check the corners by holding the frame up and looking diagonally across it — both diagonals should appear equal. A frame that isn't square will cause problems later, so take a moment to get this right. The pre-cut slots mean everything fits snugly; no force is needed.
Stretching Your Canvas: Step by Step
This is the core of framing a paint by numbers canvas at home. Follow these steps for a smooth, professional result:
- Iron the canvas. Unroll your canvas and check for wrinkles or fold marks from shipping. Iron them out on a low-to-medium setting with a light touch of steam. Always iron on the back side — never directly on the printed numbers and outlines, as the heat can smudge the ink.
- Lay the canvas face down. Place it on a flat surface with the printed design facing the table.
- Position the frame. Set the assembled stretcher frame on top of the canvas. Centre it so the painted area will sit evenly within the frame, with equal margins of excess canvas on all four sides.
- Secure the first long side. Pull the canvas up and over one long edge of the frame. Press a canvas pin through the fabric into the wooden bar. Start from the centre and work outward toward the corners, spacing pins every 5–8 cm. Keep the canvas taut but not drum-tight — firm tension is what you're after.
- Secure the opposite long side. Flip to the other long edge. Pull the canvas snug and pin from the centre outward, just as before. After each pin, flip the canvas over to check the front — make sure the design hasn't shifted off-centre.
- Secure both short sides. Repeat the same process: pull, centre, pin from the middle outward. If any pins aren't pushed in too deep, they're easy to remove for small adjustments.
- Handle the corners. Fold the excess canvas neatly at each corner — think of it like wrapping a parcel — and pin it down. We recommend folding rather than cutting. Cutting risks damaging the painted area if your margins are tight.
- Inspect the front. Turn the canvas over. The design should be centred, the surface smooth, and the tension even across all sides.
- Add final pins. If everything looks right, go around the frame and add extra pins wherever needed for a secure hold. Press the canvas gently in the centre — it should feel firm with just a slight give.

Tip: If the canvas feels slightly loose after pinning, lightly mist the back with water and let it dry naturally. Canvas shrinks as it dries, tightening itself on the frame. This trick works wonders for getting that last bit of tension right.
Varnishing and Sealing Your Finished Painting
Once you've completed your painting and the acrylic paint is fully dry (give it at least 24 hours, ideally 48), applying a varnish is a worthwhile finishing step. Varnish does three things:
- Protects the surface from dust, moisture, and UV light that can fade colours over time
- Evens out the sheen — acrylic paint often dries with inconsistent gloss levels, and varnish gives a uniform finish
- Makes colours more vivid — gloss and satin varnishes intensify the colour depth noticeably
Spray varnish is the easiest option and gives the most even coat. Apply 2–3 thin, even layers in a well-ventilated area, letting each layer dry before spraying the next. Hold the can about 25–30 cm from the surface and use steady, sweeping passes.
Choose your finish based on the look you want:
- Gloss — vivid, shiny finish that makes colours look their brightest
- Satin — a subtle sheen; the most natural, classic look
- Matte — no shine, soft and contemporary. Also reduces glare if the painting hangs near a window
Browse our accessories collection for varnishes and finishing supplies.
Framing Options: Which Method Suits Your Painting?
There are several ways to frame a paint by numbers canvas. Each gives a different look and feel:
Most common frame sizes for paint by numbers: 40×50 cm, 40×70 cm and 60×80 cm. See all options in our paint by numbers supplies.
Stretcher Bars (Canvas Wrap)
This is the most popular method for paint by numbers canvases — and the one described in this guide. The canvas is stretched directly over wooden stretcher bars, and the finished piece hangs on the wall without glass. Galleries call this a "canvas wrap," and it gives a clean, contemporary appearance.
Best for: A modern, frameless look. Works beautifully on its own or grouped in a gallery wall arrangement.
Traditional Picture Frame with Glass
You can also mount your canvas in a standard picture frame with glass or acrylic glazing. This gives a classic, polished look and offers the best protection for your painting — particularly useful in high-traffic areas, kitchens, or homes with curious pets.
For this method, you'll need to trim the canvas margins or mount it on a foam board backing. Standard frames in sizes like 40×50 cm and 40×70 cm are widely available at home décor shops and online retailers throughout Europe.
Best for: A formal, traditional look with maximum protection.
Floating Frame
A floating frame sits around the stretched canvas with a small gap between the canvas edge and the frame, creating the impression that the artwork is "floating" inside. This is a popular choice in modern interiors and adds a gallery-quality finish.
You'll need to stretch the canvas on stretcher bars first (following the steps above), then fit it inside a floating frame that matches your canvas dimensions.
Best for: A stylish, contemporary statement piece. Particularly striking with larger canvases.
What Size Frame Do You Need?
Frame size should match the painted area of your canvas, not the total canvas size (which includes unpainted margins for wrapping).
Common paint by numbers canvas sizes and the matching frame dimensions:
| Canvas Painted Area | Frame Size to Order |
|---|---|
| 20 × 20 cm | 20 × 20 cm |
| 20 × 30 cm | 20 × 30 cm |
| 30 × 40 cm | 30 × 40 cm |
| 40 × 50 cm | 40 × 50 cm |
| 50 × 65 cm | 50 × 65 cm |
| 60 × 75 cm | 60 × 75 cm |
| 60 × 80 cm | 60 × 80 cm |
Our wooden stretcher bars are designed for these standard paint by numbers canvas sizes, so you can simply order the size that matches your kit — no measuring required.
Hanging and Displaying Your Artwork
The best part: putting your finished painting on the wall.
Choosing the Right Spot
- Living room — above the sofa or on a feature wall. Ideal for larger pieces that deserve centre stage.
- Hallway or entryway — your guests see it first. Why not greet them with something you made yourself?
- Bedroom — calming landscapes, nature scenes, and soft colour palettes work particularly well here.
- Home office — an inspiring piece to glance at during work breaks.
- Kitchen or dining area — colourful still lifes, florals, or food-themed paintings bring warmth and personality.
Hanging Tips
- Hang the painting so its centre is at eye level — roughly 145–155 cm from the floor.
- Above furniture (sofa, console table, sideboard), leave about 15–25 cm between the top of the furniture and the bottom of the frame.
- Use a spirit level (or a phone app) to make sure the painting hangs straight.
- For heavier or larger pieces, use two wall hooks rather than one for stability.
- If you don't want to drill, adhesive hooks rated for the weight work well on smooth walls.
Creating a Gallery Wall

If you've completed several paint by numbers projects, a gallery wall is a brilliant way to display them together. A curated group of paintings makes a far stronger visual impact than individual pieces scattered around the house.
How to Plan Your Gallery Wall
- Lay it out on the floor first. Arrange your paintings on the floor in front of the intended wall. Experiment with different layouts before you pick up a hammer — it's much easier to rearrange on the floor than on the wall.
- Pick a unifying element. Paintings in the group should share something: a colour palette, a subject theme, or a consistent frame style. This creates cohesion even with varied sizes.
- Keep spacing consistent. Gaps of 5–8 cm between frames work well for most arrangements.
- Start from the centre. Hang the largest or most important piece first, then build outward from there.
A gallery wall also makes a thoughtful gift. Imagine painting a custom paint by numbers from a family photo, framing it, and adding it to a curated wall of your favourite finished pieces. Personal, meaningful, and a genuine conversation starter. For more creative gift ideas, have a look at our paint by numbers gift guide.
Rotate with the Seasons
One of the best things about building a collection of finished paintings is that you can swap them seasonally. Bright florals in spring, sun-drenched landscapes in summer, warm-toned scenes in autumn, and something festive for the winter months. It keeps your walls feeling fresh — and gives you a reason to start your next project.
Frequently Asked Questions
Should I frame my paint by numbers before or after painting?
We recommend stretching the canvas onto stretcher bars before you start painting. A pre-stretched canvas gives you a stable surface, smoother brushwork, and avoids the risk of cracking dried paint during stretching. If you've already finished painting, you can still frame it — just handle the canvas carefully and avoid sharp bends in painted areas.
What is the best way to frame a paint by numbers canvas?
The most popular method is stretching the canvas over wooden stretcher bars. It gives a clean, modern look and doesn't require glass. For a more formal appearance, a traditional picture frame with glass or a floating frame are excellent alternatives. Each method suits different décor styles.
Do I need to varnish my paint by numbers before framing?
Varnishing isn't strictly required, but it's highly recommended. A coat of spray varnish protects the paint from dust and UV damage, evens out the finish, and makes the colours look richer. Apply 2–3 thin layers of spray varnish, letting each dry before applying the next.
Can I use a regular picture frame for paint by numbers?
Yes. You can trim or fold the canvas to fit a standard picture frame. Ensure the frame's interior dimensions match your canvas's painted area. A frame with glass provides additional protection from dust and UV light.
What size frame do I need for a 40×50 cm paint by numbers?
You need a 40×50 cm frame. Frame size should match the painted area of your canvas, not the total canvas dimensions (which include extra margins). Our stretcher bars come in all standard paint by numbers sizes.
How do I remove wrinkles from my canvas before framing?
Iron the canvas on the back side (never on the printed front) using a low-to-medium heat setting with a light touch of steam. This smooths out wrinkles and fold marks without damaging the printed design.
Is a floating frame suitable for paint by numbers?
Absolutely. A floating frame gives your stretched canvas a gallery-quality look. Stretch the canvas on stretcher bars first, then fit the piece into a compatible floating frame. The small gap between canvas and frame creates an elegant visual effect.
Can I frame a diamond painting the same way?
Diamond paintings use a different process — since they have raised resin beads on the surface, they're best framed behind glass in a traditional picture frame rather than stretched on stretcher bars.
Ready to start your next project? Browse our paint by numbers collection and find your next wall-worthy piece.
